Sep 05, 10 by Juan Lebrijo about weblogic, JDeveloper, blog
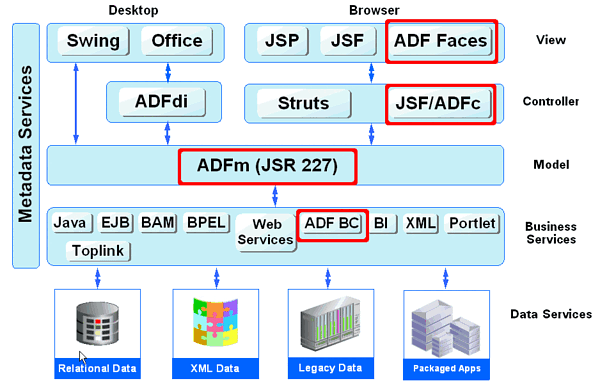
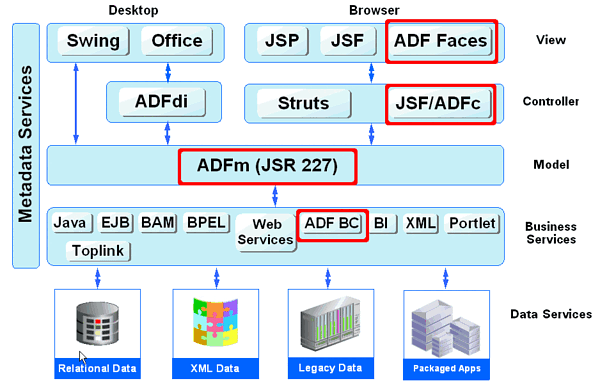
After explore diferent ways, trying to cover the business layer with Spring/Eclipse and after that with EJB 3. If you want to develop with Oracle ADF framework, our best choice is ADFbc (business components). The reason, simple, it is better integrated with top layers (data controls and view) than EJB, this is the reference solution of the company (Oracle).
Finally I choose the Oracle Development full stack, it is the best integrated, and then the most productive:
adfsimple.gif43.4 KB
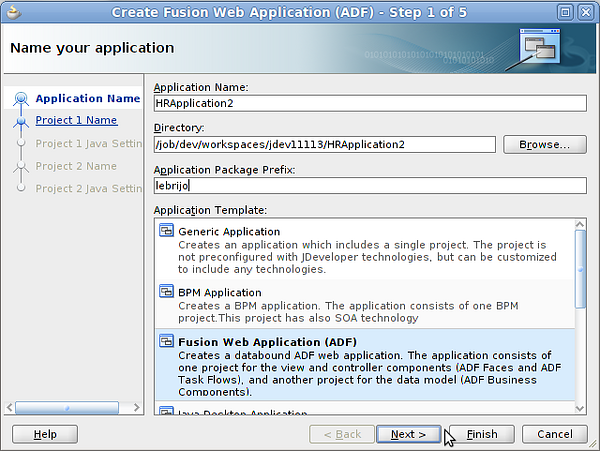
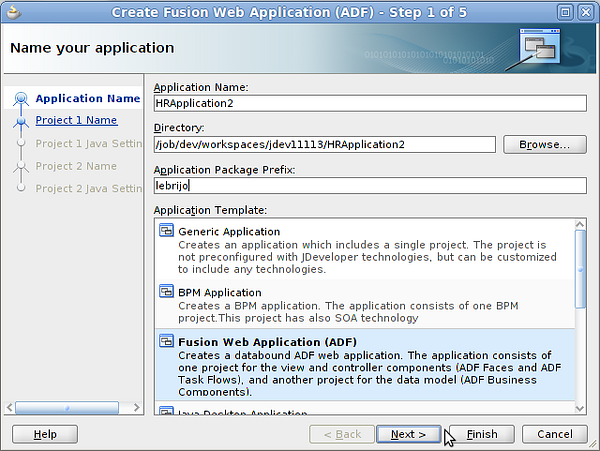
To create the application in JDeveloper select File > New > Applications > Fusion Web Application (ADF). We call it HRApplication2:
create_app.png173 KB
As in the case of Java Web generic Application, it will create tw projects:
ViewController: contains the wiew layer of our application, ADF.
Model: contains XML with our entities and relations in ADFbc.
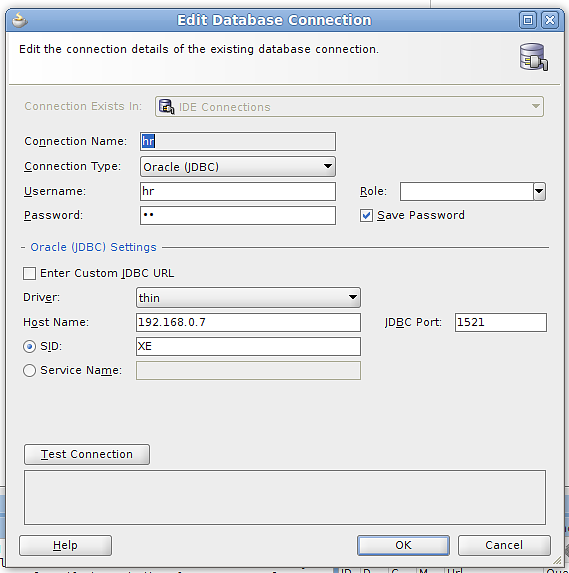
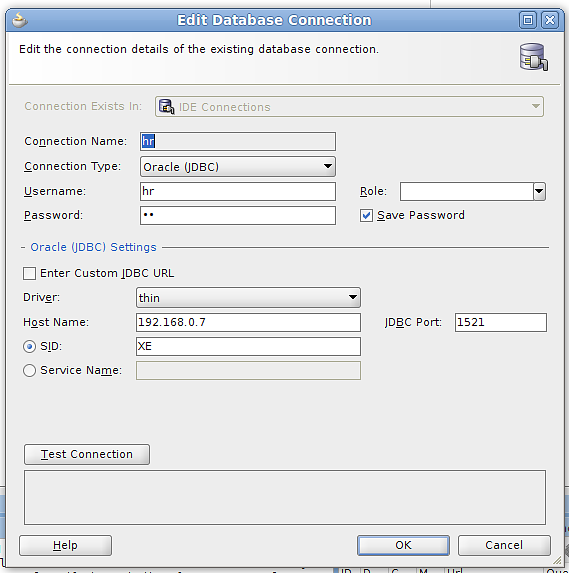
To create a database connection go to the "Database Navigator" tab, and with right buton> New, introduce the connection configuration:
db-connection.png31.2 KB
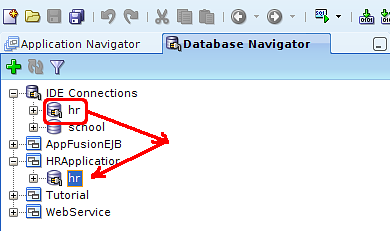
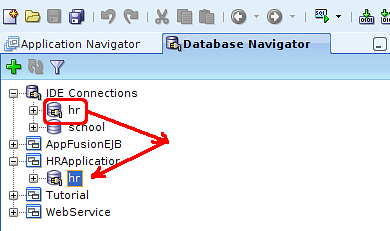
Drag and drop the connection to our application:
drag_drop_hr.png17.9 KB
Then we are ready to start modeling and programming.
Sep 05, 10 by Juan Lebrijo about weblogic, JDeveloper, blog
Después del rodeo inicial que me he marcado, intentando cubrir la capa de negocio con Spring/Eclipse y luego con EJB 3. Si queremos desarrollar con el framework de Oracle ADF, nuestra mejor opción es ADFbc (business components). La razón es simple, está mucho mejor integrada con las capas superiores (Data Controls y Vistas) que EJB, ya que es la solución de referencia de la casa (Oracle).
Al final me he tenido que plegar a la solución completa de Oracle, ya que es la que mejor integrada está en todas sus partes, y la más productiva por tanto:
adfsimple.gif43.4 KB
Para crear la aplicación en JDeveloper seleccionamos File > New > Applications > Fusion Web Application (ADF). La llamaremos HRApplication2:
create_app.png173 KB
Como en el caso de la Java Web genérica, nos crea dos proyectos::
ViewController: que contendrá la capa de vista de nuestra aplicación, ADF.
Model: contendrá los XML que definen las entidades y relaciones en ADFbc.
Para crear la conexión a la BBDD en la pestaña Database Navigator con botón derecho > New, introducimos los datos:
db-connection.png31.2 KB
Y arrastramos la conexión a nuestra aplicación:
drag_drop_hr.png17.9 KB
Con esto tenemos la aplicación para empezar a modelarla y a construirla.
Sep 02, 10 by Juan Lebrijo about SoapUI, Web Services, Java, blog
We will create the needed classes to generate a Web Service client from its WSDL.
We will base in the HelloWorld project, and here will add the security. In this project we response with a Hello for the name which sent as argument through the Web Service.
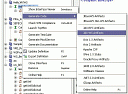
In order to generate the classe we will use SoapUI:
1004.thumbnail.gif6.14 KB
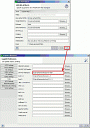
We must to locate in our hard disk the wsimport.bat tool, downloaded with the SUN standard package implementation (of JAX-WS):
1005.thumbnail.gif5.47 KB
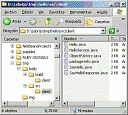
It generates a folder with sources and other with compiled classes:
1006.thumbnail.gif8.12 KB
To write the client helped with this classes is as easy as this:
package client;

import java.net.MalformedURLException;
import java.net.URL;

import javax.xml.namespace.QName;
import javax.xml.ws.BindingProvider;

public class HelloClient {

    public static void main(String[] args) {
        HelloService service = null;
        try {
            // Creamos el servicio con el WSDL
            URL wsdlLocation = new URL("http://localhost:7001/wsc/HelloService?WSDL");
            String targetNamespace="http://services/";
            String name="HelloService";
            service = new HelloService( wsdlLocation, new QName(targetNamespace, name));
            Hello port = service.getHelloPort();
            // Añadimos capacidades de seguridad a la llamada
            BindingProvider provider = (BindingProvider) port;
            provider.getRequestContext().put(BindingProvider.USERNAME_PROPERTY, "user");
            provider.getRequestContext().put(BindingProvider.PASSWORD_PROPERTY, "12345678");
            //Mostramos el resultado
            System.out.println(port.sayHello(args[0]));
        } catch (MalformedURLException e ) {
            e.printStackTrace();
        }
    }
}