Mar 26, 08 by Juan Lebrijo about NetBeans, Database, blog
At this post we are going to see how to connect Netbeans IDE to your Database. In my case I work over Oracle SGBD, then I will access to this SGBD.
We will use the JDBC standar, java based for remote DDBB connections purposes.
Let's see two base links for the purpose of this post::
This is a Netbenas wiki post where are written links to all SGBD drivers supported. Then, if you are searching for PosgreSQL, MySQL, M$, DB2,.. you can try it.
Here we have the Oracle JDBC driver. I can afirm that it would run for any Oracle version up to 9i.
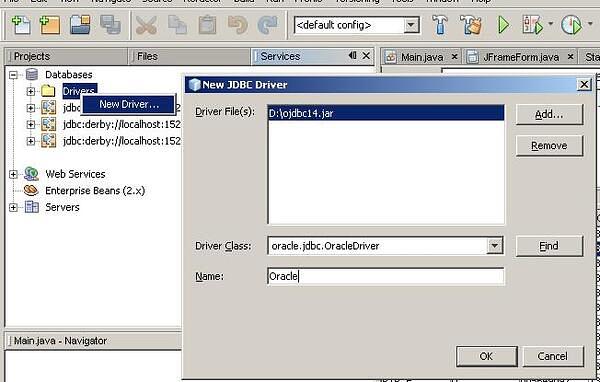
In the second link I downloaded the driver in the file: ojdbc14.jar. The installation is at the tab Services --> clicking the right mouse button over Drivers --> New Driver ...NB_SGBD_01.JPG33.9 KB
We look for the driver downloaded in our system, and install it.
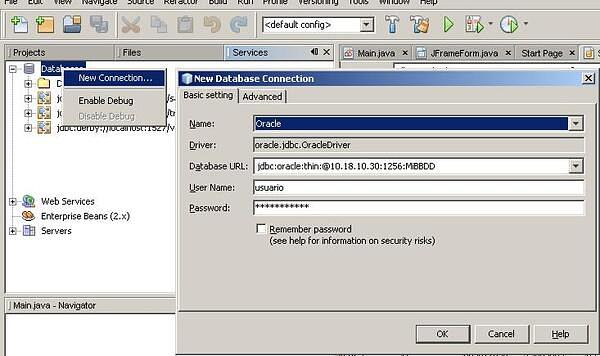
To create a new connection, we will do at tab Services --> clicking the right mouse button over DataBases --> New Connection ...NB_SGBD_02.JPG35.5 KB
We must make our connection URL with the following model:
jdbc:oracle:thin:@{HOST}:{PORT}:{SID}
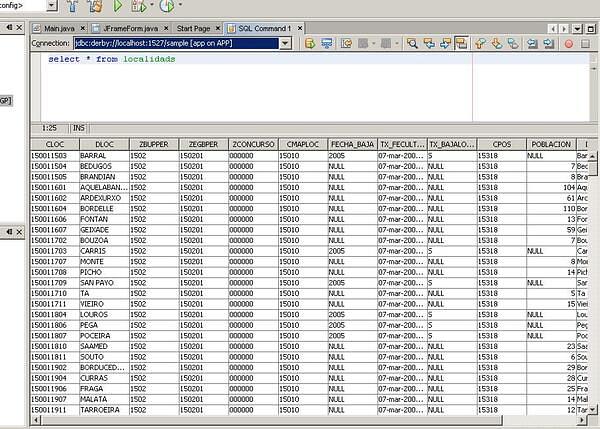
You can probe the connection making queries in the front window:
NB_SGBD_03.JPG63.8 KB
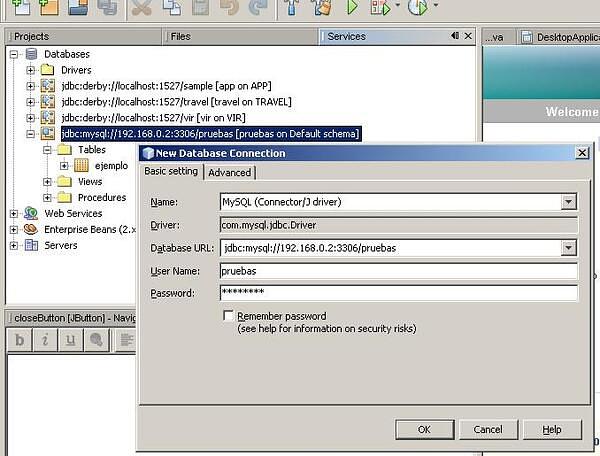
Obviously, with a JDBC preinstalled in Netbeans as MySQL driver, would be easier create a connection. You can see a MySQL example at the image:
NB_SGBD_04.JPG44.6 KB
NetBeans is an excellent IDE (Integrated Development Environment) developed by Sun MicroSystems. Early to develop J2EE applications and later to develop Ruby, PHP, C, C++,...
Today we will install this software and show any links to start to develop Java web applications.
As usually I will start with my reference table:
Origin
http://www.netbeans.org
Repository
http://download.netbeans.org
JDK: http://java.sun.com/javase/downloads/index.jsp
Package
netbeans-6.0.1-ml-windows.exe
JDK 6 Update 5
Documentation
General: http://www.netbeans.org/kb/
Files
Configuration: LocalSettings.php
Mandatory to install previously a JDK (Java Development Kit) to the functionalities to Java development.
There are many tastes to download, depending on which languages and frameworks we need (JEE, Mobility, Ruby,...). We download the total version which have the following features:
Base IDE: Basic windows environment.
Java SE: basic tools for Java programming like editor, debugger ...
Web & Java EE: Tools to create JEE proyects, with servlets support, taglib, JSP, Struts, JSF, EJB,...
Mobility: Package to develop for mobile devices.
UML: Making Software egineering schemas, and reverse engineering.
SOA: Creating applications based on en Service Oriented Architecture.
Ruby: Creating applications Ruby and RoR.
C/C++: DEveloping in C and C++.
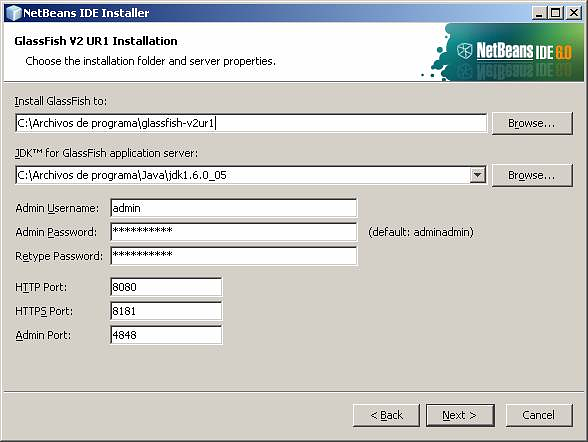
GlassFish V2 UR1: Sun Open Server which implements JEE5, as EJBs and application server.
netbeans_glashfish.PNG113 KB
Apache Tomcat 6.0.14: Application server compatible with Servlets and JSPs.
At last, and adding to the basic tutorials in my reference table, there are this two fonts too:
JavaPassion: Any Java area tutorials by a Sun egineer.
NetBeans es un magnifico IDE (Integrated Development Environment) desarrollado por Sun MicroSystems. Inicialmente para desarrollar aplicaciones con J2EE (Java) pero posteriormente adaptado a Ruby, PHP, C, C++,...
Hoy instalaremos este Software y veremos alguna dirección para prepararnos para desarrollar aplicaciones Java en web.
Como siempre lo primero es mi ficha de referencias:
Origen
http://www.netbeans.org
Repositorio
http://download.netbeans.org
JDK: http://java.sun.com/javase/downloads/index.jsp
Paquete
netbeans-6.0.1-ml-windows.exe
JDK 6 Update 5
Documentación
General: http://www.netbeans.org/kb/
Ficheros
Configuración: LocalSettings.php
Es esencial tener instalado una JDK (Java Development Kit) al menos para las funcionalidades de desarrollo Java.
Hay varios sabores para descargar según con que lenguajes y en que entornos se deseen crear las aplicaciones (JEE, Mobility, Ruby,...). Nos descargamos la completa que tiene las siguientes características:
Base IDE: Entorno básico de ventanas
Java SE: Herramientas básicas para programar en Java com el editor, debugger ...
Web & Java EE: Herramientas para crear proyectos JEE, como soporte para servlets, taglibs, JSP, Struts, JSF, EJB,...
Mobility: Paquete para desarrollar aplicaciones para dispositivos móviles
UML: Realización de esquemas de desarrollo de software, e ingenieria inversa.
SOA: Creando aplicaciones basadas en Service Oriented Architecture.
Ruby: Creando aplicaciones Ruby y RoR.
C/C++: Desarrollando en C y C++.
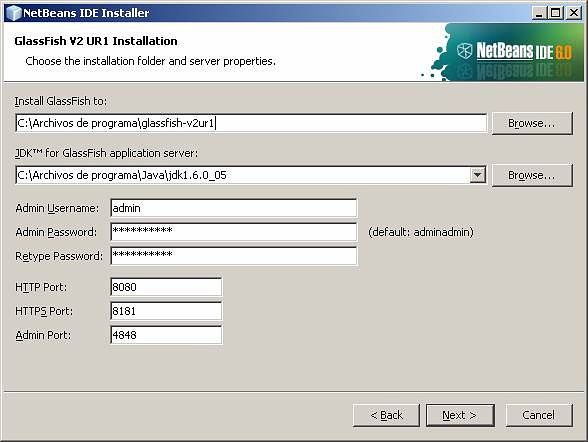
GlassFish V2 UR1: Servidor abierto de Sun que implementa JEE5, como servidor de aplicaciones y EJBs.
netbeans_glashfish.PNG113 KB
Apache Tomcat 6.0.14: Servidor de aplicaciones con capacidad para Servlets y JSPs.
Por último, y aparte de los tutoriales básicos de la ficha también están estas dos fuentes:
JavaPassion: tutoriales de todo tipo de un ingeniero de Sun.